Configuration
This section guides you through setting up your Discord bot application and configuring the necessary environment variables for the bot to run.
Create a Discord Bot Application
Section titled “Create a Discord Bot Application”If you don’t already have a Discord bot application, you’ll need to create one via the Discord Developer Portal.
- Go to the Discord Developer Portal.
- Log in with your Discord account.
- Click on “New Application”.
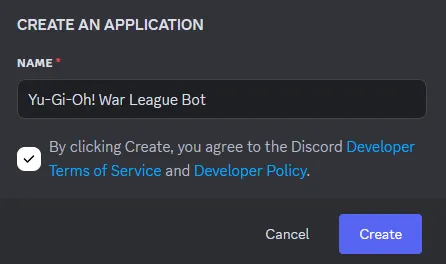
- Give your application a name (e.g., “Yu-Gi-Oh! War League Bot”) and click “Create”.
Configure Bot Intents and Permissions
Section titled “Configure Bot Intents and Permissions”Within your new application settings:
- Navigate to the “Bot” tab on the left sidebar.
- Under “Privileged Gateway Intents,” enable the following:
- SERVER MEMBERS INTENT: Required to access information about server members.
- MESSAGE CONTENT INTENT: Required for the bot to read message content and process commands.
- Save Changes.

Invite the Bot to Your Server
Section titled “Invite the Bot to Your Server”To allow the bot to join your Discord server:
- Navigate to the “OAuth2” tab on the left sidebar.
- Scroll down to the “OAuth2 URL Generator” section.
- Under “SCOPES,” check the
botscope. - A “BOT PERMISSIONS” section will appear. Select the minimum required permissions for the bot to function:
Send MessagesSend Messages in ThreadsManage MessagesEmbed LinksAttach FilesRead Message HistoryView Channels
- Under “INTEGRATION TYPE,” select
In-app Authorization(orGuild Installdepending on your Discord Developer Portal version). - A generated URL will appear at the bottom of the page. Copy this URL.
- Paste the URL into your web browser and follow the prompts to invite the bot to your desired server.
Obtain Your Bot Token
Section titled “Obtain Your Bot Token”You will need your bot’s unique token to connect the bot to Discord.
- Navigate back to the “Bot” tab in the Discord Developer Portal.
- Under “Build-A-Bot,” locate the “TOKEN” section.
- Click the “Reset Token” button. Copy this token immediately and store it securely. This token is sensitive and should not be shared publicly.

Configure Environment Variables
Section titled “Configure Environment Variables”In the root directory of the cloned repository, you will find a file named .env.example. Rename this file to .env.
Now, open the .env file in a text editor and fill in the following variables:
ENVIORNMENT:- Set to
productionfor a standard deployment. - Set to
localfor local development or testing purposes. This may affect certain bot behaviors like submission limits.
- Set to
BOT_TOKEN: Paste the bot token you obtained in the previous step here.- Example:
BOT_TOKEN=YOUR_DISCORD_BOT_TOKEN
- Example:
DATABASE_URL:- For the default local SQLite database, set this to:
sqlite+aiosqlite:///data/database.db
- For the default local SQLite database, set this to:
CARD_IMAGE_BASE_URL: The base URL for fetching card images. This should be the part of the URL before the card ID.- Example (using the structure from
images.ygoprodeck.com):CARD_IMAGE_BASE_URL=https://images.ygoprodeck.com/images/cards_small/
- Example (using the structure from
CARD_IMAGE_FORMAT: The file extension for the card images.- Example (using the structure from
images.ygoprodeck.com):CARD_IMAGE_FORMAT=.jpg
- Example (using the structure from
ADMIN_ROLES: A comma-separated list of Discord role IDs that should have administrative privileges for the bot. These roles will have access to commands for configuring the league and viewing submissions.- Example:
ADMIN_ROLES=1234567890,9876543210
- Example:
TEAM_CAPTAIN_ROLES: A comma-separated list of Discord role IDs designated as Team Captains. Only users with one of these roles and a validTEAM_ROLESrole can submit decks.- Example:
TEAM_CAPTAIN_ROLES=1122334455,6677889900
- Example:
TEAM_ROLES: A comma-separated list of Discord role IDs representing the participating teams in the current season/week. Users need to have one of these roles to be eligible for submission.- Example:
TEAM_ROLES=2233445566,7788990011
- Example:
Your .env file should now contain all the necessary configuration for the bot to connect to Discord and function correctly.